Compress Video Quick Action
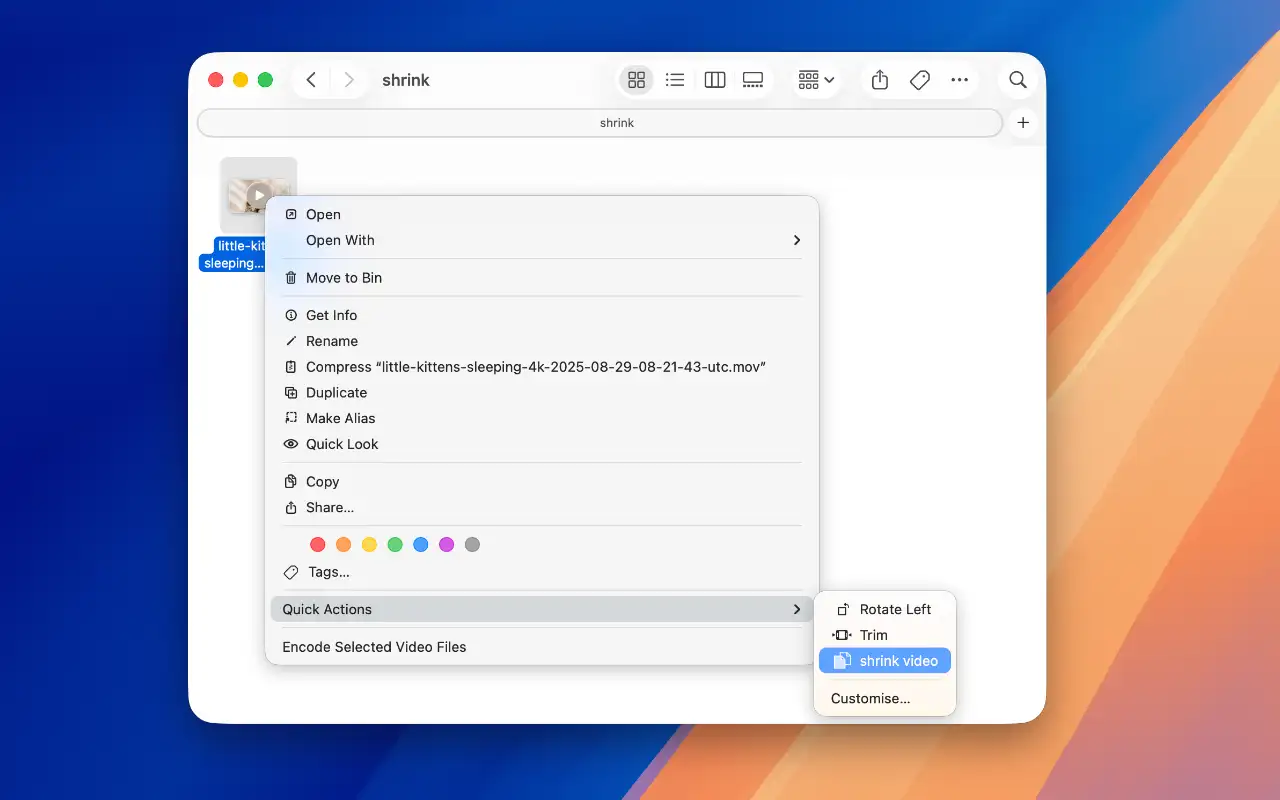
Create a mac Quick Action that adds a right-click menu option to compress videos using FFmpeg directly from Finder. When done it will look like this:
Prerequisites
Install FFmpeg via Homebrew:
brew install ffmpegStep 1: Open Automator
- Press Cmd + Space and type "Automator"
- Select Quick Action
Step 2: Configure Workflow Settings
At the top of the Automator window set the following:
- Workflow receives current -> movie files
- In -> Finder
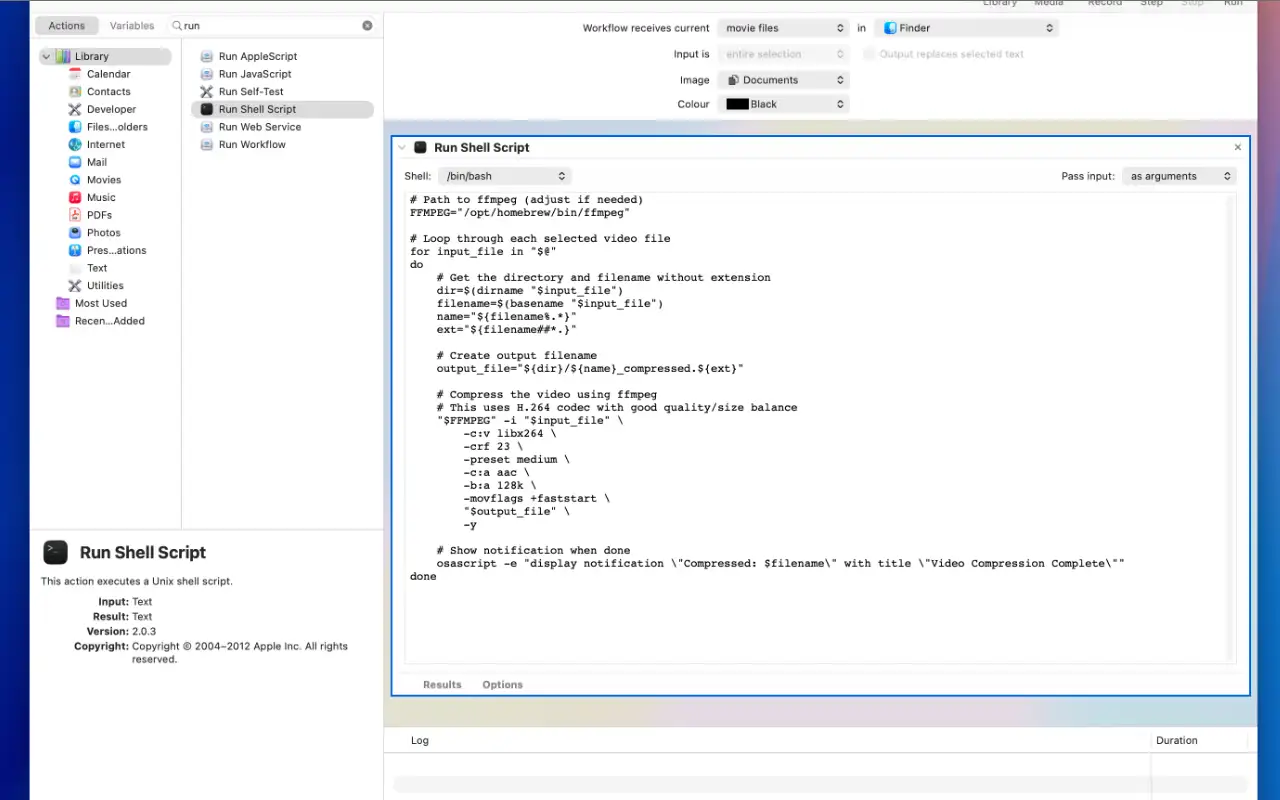
Step 3: Add Shell Script Action
Search for Run Shell Script in the actions library. Drag it to the workflow area
- Set Shell -> /bin/bash
- Set Pass input -> as arguments
Step 4: Add Compression Script
Paste this script into the text area:
# Path to ffmpeg
FFMPEG="/opt/homebrew/bin/ffmpeg"
# Loop through each selected video
for input_file in "$@"
do
# Get directory and filename
dir=$(dirname "$input_file")
filename=$(basename "$input_file")
name="${filename%.*}"
ext="${filename##*.}"
# Create output filename
output_file="${dir}/${name}_compressed.${ext}"
# Compress video
"$FFMPEG" -i "$input_file" \
-c:v libx264 \
-crf 23 \
-preset medium \
-c:a aac \
-b:a 128k \
-movflags +faststart \
"$output_file" \
-y
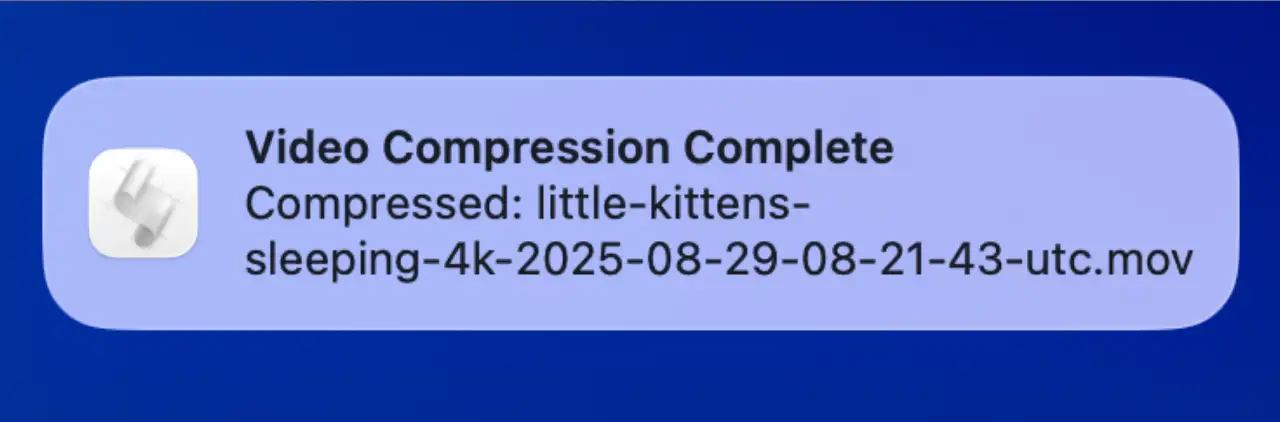
# Show notification
osascript -e "display notification \"Compressed: $filename\" with title \"Video Compression Complete\""
doneStep 5: Save the Quick Action
- Press Cmd + S
- Name it 'Shrink Video'
The script will be saved & you can use it
Using Your Shortcut
- Right-click any video file in Finder
- Go to Quick Actions
- Select Shrink Video
- Compressed video appears with _compressed suffix
When compression is complete you will see a notification like this:
Adjust Compression Level
If the video looks low quality or is still very large, you can change the crf value for different quality levels:
- -crf 18 - Higher quality, larger file
- -crf 23 - Balanced (default)
- -crf 28 - Smaller file, lower quality
Maximum Compression
For aggressive size reduction, replace the ffmpeg command with:
"$FFMPEG" -i "$input_file" \
    -c:v libx264 \
    -crf 28 \
    -preset slower \
    -vf "scale=iw*0.75:ih*0.75" \
    -c:a aac \
    -b:a 96k \
    -movflags +faststart \
    "$output_file" \
    -y
Easier Option
If you prefer a simpler solution without Terminal commands or Automator setup, try TinyFast. It's a lightweight Mac app that lets you compress videos, images, PDFs & more by just dragging in and out. Perfect for developers and creators who want speed and simplicity without sacrificing privacy.

